The Bah Humbug Christmas Tree

Well Hello again everyone, and here we are for the Finale of the Challenge club.

Sad times hey? But its been a fun ride and I for one have really enjoyed being a part of the club and making lots of new friends along the way. I haven’t entered every Month because of commitments but entered quite a few.

This Month, its all about straight lines and let me warn you now! This was no easy job. I have made straight line soaps before but not this way. I have always used a stick blender, so this was a little out of my comfort zone, but, hey ho, lets give it a go.

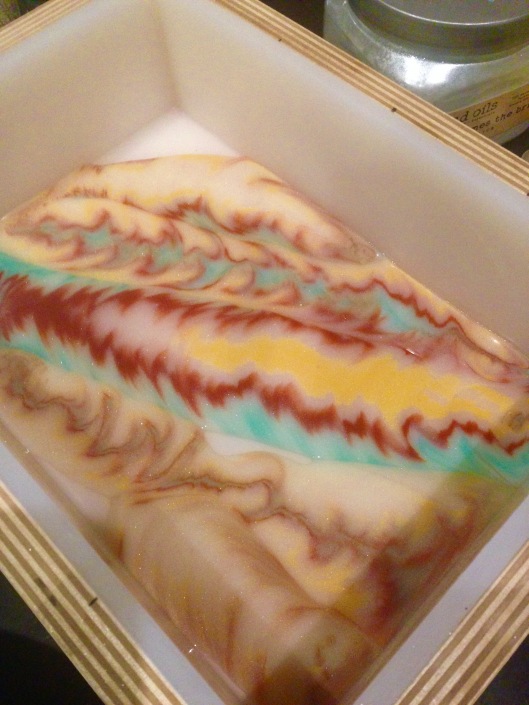
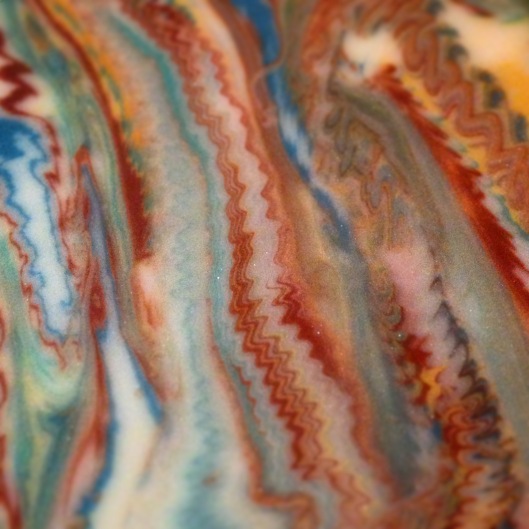
A few of my other straight line soaps.

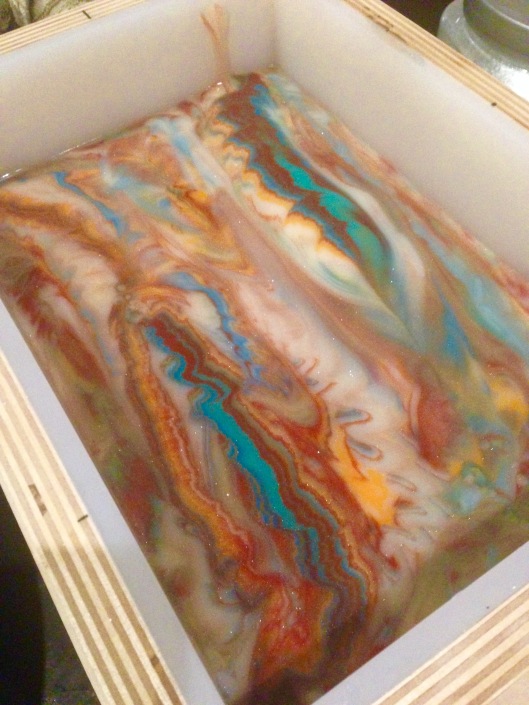
I had one try last week and I just wasn’t happy with the results, (Pic below) but I used the stick blender and got lots of bubbles and glycerine rivers, so I had another try this week only using a whisk and a small bowl with a rounded bottom, to make it easier to whisk.

fullsizeoutput_298a

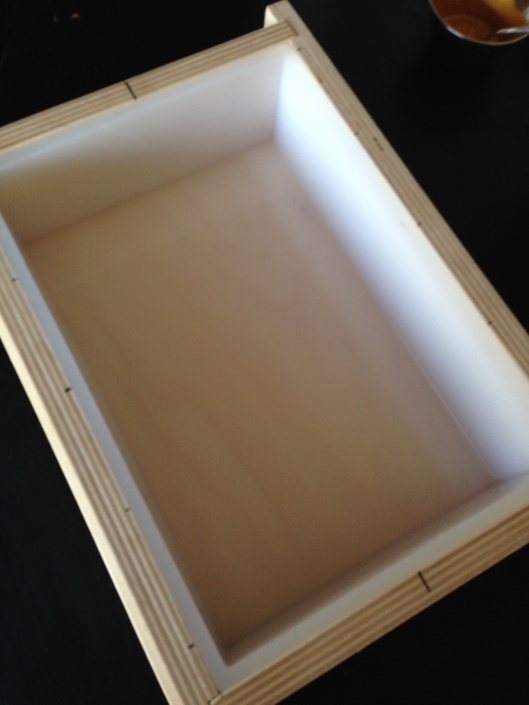
With my first try too, I had problems with the liner of my mould bowing in the middle, I had to clip it up which stuck in the soap so for my second one, I used an old faithful silicone mould I bought from Brambleberry years ago, it worked a treat.

IMG_5236

For my first part of the pour, my mould was laid down quite flat as I wanted to form a Christmas tree shape, although a basic one and probably looks nothing like a tree, thats the shape i wanted lol. A triangle shape.

The outside was going to be pink so I used Voodoo from Madoils now Madmicas, fragrance is Humbug mints from scent perfique which slightly accelerates and thats what I needed for my layers to set up a bit quicker. I also had my mould set on a heatpad which helped to harden up the layers.

IMG_5237

Once this layer set, it took about half an hour, I flipped the mould over and poured the same amount in the other side.

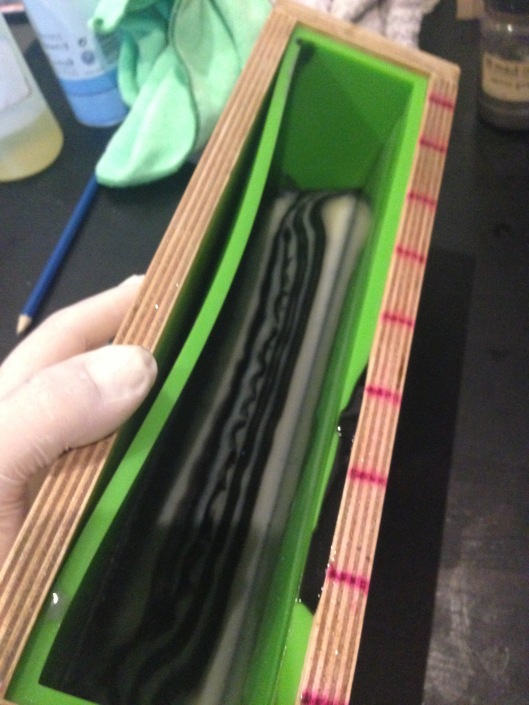
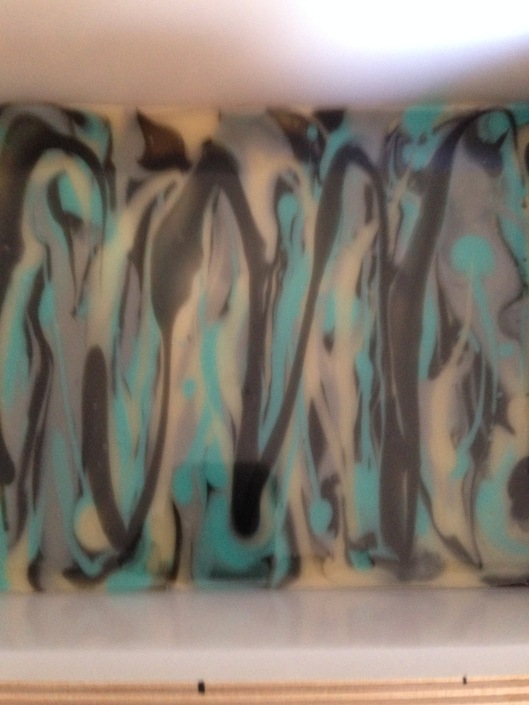
Same again, left this for half an hour and then stood the mould up to pour the black and white humbug tree.

IMG_5241

I used Black oxide and Titanium dioxide for colours.

Black, white, black, white, until the mould was full, 10 layers.

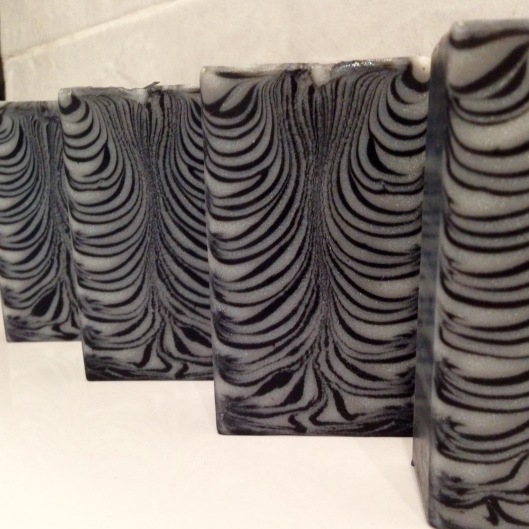
All together this pour took around 8 hours, it is very time consuming. I popped it in the oven at 6p.m. for an hour and then just left it to cool. It was rock hard by midnight so I unmoulded it and left it overnight to cut the next day.

Here is the cut and cleaned up pics. Definitely not perfect but I will not have time to do another so this is it.

fullsizeoutput_2987

fullsizeoutput_2986

IMG_5274

This one is dressed up for his photo shoot.

The Bah Humbug tree is finished and although it took forever to pour, I enjoyed the Challenge.

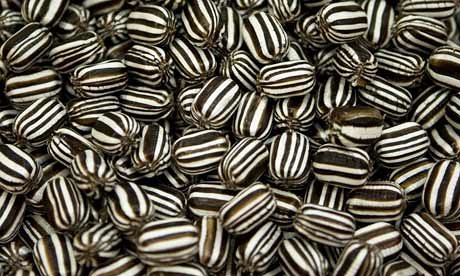
The name comes from the little mint humbug sweets that I based my soap on last year, I just wanted to revisit, getting nostalgic for the Finale lol.


All I want to say Amy is “It has been a blast, I’ve enjoyed being a part of your club and I wish you every success for your future business!”

As always, Love from Spain.

Carolyn X

Unicone & Rainbows

Well hello from sunny Spain! Although we have just had a huge thunder storm, its back to being quite sunny again.

This Month in Challenge club it is all about Unicorns & Rainbows. I haven’t entered the club for a little while because I’ve been so busy with work but when I seen that it was the last 3 Months, EVER! I had to make time to enter. Amy will be missed but I know how time consuming work can be, she has been such a gracious host and I wish her all the best for the future!! “We love you Amy!!”

I have made Unicorn soaps before but not incorporated a rainbow.

These are a couple I have made.

Firstly, I made some soap dough in all the rainbow colours, I can’t tell you how many times I have sang the rainbow song in my head, driving me mad lol. Red and yellow and pink and green, orange and purple and blue, I can sing a rainbow, sing a rainbow, sing a rainbow too. Now you can all sing the rainbow song in your head!

I used a flower press to punch out the rainbow flowers and painted the inside with some here comes the bride white mica. I also made the horns and ears from soap dough. I rolled 3 colours into thin tubes and twirled them together to get the 3 colour horn. I used a teardrop cookie cutter for the ears.

Now that all my embeds were made, I could start on the base. I decided to use my silicone ice cream mould and call them Unicones

I used a fragrance called Exotic Indian Rose which speeds up trace so that I wouldn’t have to wait around for long for my piping to set up.

I piped them quite high as I had made the ears and horns larger than I normally do so that they didn’t get lost in all the piping and flowers.

Here they are all piped and embeds in, ready to put away for the night.

The following day, I tried to unmould but they were a little soft so I popped them in the freezer for an hour. So much easier to get out of individual moulds when they have been frozen a little.

IMG_4681

Here they are, sitting pretty for their photoshoot.

This is the front and back.

This was a fun challenge!

Thankyou Amy!

As always, Love from Spain.

Carolyn x

LouBou handbag for Greatcakes Soapworks Challenge

Hi Everyone!

Coming into the Challenge club this Month with the soap dough technique, I had lots of ideas running through my head. I have dabbled with soap dough for a while and made some great projects but wanted to try something a bit different. I’ve made lilies, a cat, apple strudel, a fairy house and unicorns to name but a few but I needed something to push me that little bit further….

Soo… I thought! What about a shoe and handbag, that must be pretty challenging, so my Louboutin heel & purse were created. Sadly, my shoe won’t be allowed as it isn’t a modified bar but I can submit the handbag  so that will be my entry but I will show how I made both.

I made my soap dough with Sorcery soaps recipe which includes lard and mango butter so it would make a hardish dough, usually I use my excess soap batter to make little tarts that I put away in bags to mould later. I made black and red as I already had some white to use.

IMG_3878

I started off the handbag with a bar of soap I have just made. I rolled out the black dough and fully covered the bar with that.

I then rolled out the red and went over that with a patterned roller to give the red  texture.

I made a handle, first a strip of black and then a thinner strip of red and attached that, all with soap glue, soap and water mixed to make a paste. Also made a bow by pushing the black into my little silicone push mould.

I made some little flowers with a fondant plunger to decorate too. This is the finished handbag complete with bow and flowers.

fullsizeoutput_2092

fullsizeoutput_2091

fullsizeoutput_208d


For the shoe I bought a fondant heel former which came with a stand to rest the sole on while you stick everything together.

IMG_3868

First I pushed the black dough into the heel former and popped that into the freezer for half an hour to harden up a little.

Next I rolled out the red to cut a sole and layer that on the platform to shape it, I also cut an inner black sole to strengthen it slightly. My dough was very sticky so i used corn starch to stop it sticking to the board and rolling pin, I used some rubbing alcohol to clean it off.

I then cut all the pieces for the shoe I needed and cut out some little flowers with a fondant plunger in different colors to stick on for decoration, I used soap and warm water to make a glue which stuck everything together.

Here is my finished Louboutin inspired heel, complete with signature red sole.

IMG_3858

fullsizeoutput_2040

fullsizeoutput_208a

So that is the completed Handbag and shoe. I love shoes and bags so this really reflects my love for accessories.

It was challenging to say the least holding the shoe together. It stands up though and seems stable but I don’t think I will be wearing it anytime soon 🙂

The shoe is life size (A UK size 5) Just so you can picture how big it is lol.

Thanks to Amy and Tatiana this Month for another great challenge.

As always, Love from Spain.

Carolyn x

BAH! Humbug soap for Greatcakes soap works challenge.

Hi Everyone & Merry Christmas.

Ive had a very busy Month. Last month I was getting our bedroom and En-suite refurbished which is now virtually finished apart from a bathroom door, but hey! Who needs privacy anyway? I have daughters who think they can burst into the bathroom whilst I’m sitting in the bath, now they just have 1 less door to come through 🙂

img_2034

A few pictures of before and after. I made a black, white and grey tiger stripe soap a few months ago, which matched perfectly into the color scheme of my bathroom.

I slept on a mattress on my dining room floor for 4 weeks so everything coming together was great. I finally had a bed and new bathroom to enjoy. I could begin to make soap again…

This month, it is tiger stripes technique. This pour was one of the first techniques I tried when I started making soap, just over 2 years ago.

I decided to try a modified version. I used the wall pour technique similar to a skinny shimmy.

I went with the same colours as the striped tile of the bathroom, black, white and grey again. I used mad oils micas for the white and grey, the black is pigment oxide.

img_2044

For fragrance I used Lemon Peel Zest from Scent Perfique which is a lovely fresh, zesty scent but best of all it behaves itself. Lots of working time to pour my layers.

I used squirt bottles to get a very fine line down the side of the mould. I alternated black, white then grey with the mould tipped to the side and passed on one side 9 times, turned the mould around, tipped to the side and passed 9 times again. I carried on doing this until the mould was practically full. My soap stayed very fluid throughout. For the top, I poured lines of soap and swirled a little with a skewer.

img_2046

img_2047

img_2053

With my slow moving recipe, I always have to pop it in the oven for an hour and then leave alone overnight to work its magic.

The following day only 12 hours after it was ready to cut. This is a pic just after unmoulding which you can see the fine lines at the side.

fullsizeoutput_147b

Here are the cut pics.

img_2060

fullsizeoutput_1478

fullsizeoutput_147c

fullsizeoutput_1487

I had a little bit of soap batter left at the end so I made some cute little hearts which I can give away as samples.

img_2077

Once I had cut my soaps, they reminded me of little mint humbugs stacked on top of one another, that is why it is called BAH Humbug, not because I don’t like Christmas lol.

img_2075

Thanks to Amy again for hosting these great challenges. Sometimes they are hard, sometimes easy, but very enjoyable.

Hope you all have a great Christmas & New Year and hope to see you all next year.

As Always, Love from Spain!

Carolyn x

A not so frosty tale……

Living in Spain, we never get snow! It is always sunny. Even Christmas day last year, the sun was beating down but the strangest thing happened today!…..

While driving to Ikea, to pick up bits and bobs, I needed bedroom supplies, especially wardrobe knobs.

I was almost halfway there when something strange occurred, my car was whipped into the air, higher than a bird!

Higher and higher we soared, up past the mountains so grand. Until we landed with a bump in a snow filled wonder land.

I had landed in a magical place, frosty, cold and crisp. Wind blowing up the snow like a little willow the whisp.

Ive not seen anything like it, snowmen wandering free. Santa sitting in his chair, sipping a cup of tea.

Elves making toys and reindeer roam, this place is such a joy. I think I might just stay here and help to make a toy.

I could also make the soaps, for St. Nick and his Queen. Coco frost and Mistletoe, scents so fresh and clean.

So while wandering around the place I came across a globe. Very large and made of glass, it was a sight to behold!

But looking through that window, all was not so good. A little girl sat, her head in hands, crying in a flood.

Oh what could the matter be? but then I seen the puddle. Carrot, buttons and some sticks all in a crumpled muddle.

You see the girl had made a man, with snow so crisp and fun. There had been a fall like never seen, in the land of forever sun.

She had named him “Freddy the snowman” such a fitting title. A scarf of blue, button eyes and carrot were all so vital.

That child had so much fun, dancing around her mate. Singing, jumping and general joy but she did not know his fate.

The following morning came, along with the blazing heat. Thats where this story becomes so sad, you better take a seat.

She jumped up out of bed that morn, to greet her little man, also to build his wife and name his girl Suzanne.

But the sun in Spain had other plans, it came out blazing bright! It melted Freddy down, he was nowhere in sight.

Everything lay in a crumpled mess, soaking wet right through. Her build had ended abruptly, OH! What could she do?

“MUM! Please take me to the beach” she shouted to her Mother. She couldn’t have snow but there was lots of sand, she was going to build another.

Freddy would have his Missus, alas made out of sand. Forever they would be together, forever hand in hand….

So back to the land of snow for me, but I knew I could not hide. I got mechanic elf on board, to fix my dodgy ride.

Thats when I woke, with a startled jump! It had all just been in dreams. That Winter Wonder land of snow, was it all it seems?

You see in my dressing gown pocket, there was a little piece of white. Oh my goodness, could it be? The snow I had seen that night?

Alas, it melted away, just like that elusive man. Maybe next year, there will be snow, can you see it? I SURE CAN!

When I moved away from the UK, I knew it would be hot. No more snowy Christmas days. I miss the snow. Earlier this year, we headed up to Sierra Nevada, a ski resort literally 2 hours from where we live. My 2 little ones were born in Spain so had never seen snow before. They loved it! We all went skiing and spent a couple of days enjoying the snow. Snowmen were built and snowballs thrown. So much fun with the family!

My little girl sliding down a snow bank and wiping out a little boy! Fun in the snow!

That is where my inspiration came for my soap. A melted snowman. Snowmen, really are a lot of hard work but fun to make. Kids and adults get so much joy out of the build but they are short lived. As fast as they are made, the sun comes out and he is gone. A small window of opportunity to make but I will capture him in soap forever.

There is nothing like a cup of hot cocoa too while building a snowman. Swirled with cream, topped with chocolate sprinkles, a salted caramel drizzle, tiny marshmallows and finished with a wafer biscuit. My next soap to go with the melted Freddy.

Here is my finished soaps. A little bit of fun, made for my little ones and big ones if they want one 🙂

img_1934

img_1950

img_1940

So there we have it…… Hot Cocoa and the melted snowman soaps.

As always, love from Spain.

Carolyn x

“Banos Arabes” Cosmic Wave soap for Greatcakes Soapworks Challenge

Hi Everyone!

I’m a bit upside down this month. We are having our bedroom and en-suite bathroom reformed so everything is everywhere in the house. When one room is getting done the whole house is topsy turvy. Hopefully by next month I will be back to normal. Updated, gorgeous bedroom and bathroom pics to follow lol.

My inspiration for my Cosmic Wave soap this month came from a Spa day I booked for myself and 2 older daughters a couple of weeks ago to celebrate my 22 year olds birthday.

I love all the colors used in the tiles, tagines and Moroccan pots. Such rich, opulent, exotic tones which would be perfect in my soap.

img_1794

We went to a beautiful Hammam Spa,  Arabic bathhouse and spent a lovely relaxing morning being scrubbed, bathed and massaged.

Firstly, we bathed in the cool, warm and hot pools, relaxed with a cup of Moroccan mint tea in between and then got called for our treatment. It involved laying on a warm, stone slab. Being rubbed down with a Turkish red soap and exfoliated with a Kessa mit. They put loads of suds on you beforehand and then rinse with warm water before the sloughing begins. Once that was over and I was dried off, it was off to the massage bed. I picked Red Amber oil but could have had Lavender, Biznaga or Rose.

Bliss, I tell you!!  The only problem, It wasn’t long enough, but I suppose no massage lasts for 5 hours…..

For my soap I decided to stick with a white base and add the colors to that. My colors are Peacock, Tahitian Teal, Sister Golden Hair, Tangerine Dream and Brick House Madoils micas. I love how deep their micas are. For the white base I used Here comes the bride, also Madoils mica. Because I was using 38% water, I didn’t want glycerin rivers so decided against Titanium Dioxide.

img_1833

Fragrance was White tea and mint with a touch of Spearmint essential oil.

I used my trusted slow moving recipe of equal parts Coconut, Palm, Almond and Olive oils.

I started off pouring the soap into my jug, alternating colours like one of the methods Tatiana showed in the tutorial.

img_1836

img_1837

This was my first layer pour.

After that, I poured some white into the jug and just added the colours in a swirly pattern also like Tatiana showed.

img_1838

Some of my ribbons went slightly muddy so I let the soap batter thicken slightly. I think that was the problem, my trace was a bit thin but once thickened, it started to behave. If trace is too thin, the soap tends to break through to the underneath layer. It needs to stay on top so getting that perfect texture was key.

img_1841

This was after all the soap was poured into the mould. I popped it into the oven at 65 degrees c for one hour, turned off the oven and left it overnight.

This method works perfectly with my slow moving recipe which I used to dread but pretty much have it mastered now.

img_1842

Unmoulded and ready for cutting.

img_1856

img_1860

I like how bright and diverse the pattern turns out in this technique.

Thanks Amy and Tatsiana for another great challenge. I will certainly be trying this one again.

See you next month……

As always, Love from Spain!

Carolyn x

Under the Boardwalk (Wood grain soap) for Greatcakes Soapworks Challenge.

Once upon a time…..

There was a girl/older lady who lived in a cold, rainy Country and could only dream about warm sunny days, walking on the beach and looking out to the great Mediterranean sea. Her dream came true when her and the hubby decided, enough was enough of the dreary wet days so they upped and moved to pastures new in the sun. 11 years later…. said hubby asked if he could take his wife away for the night, away from children, their home, constant chitter chatter to a quiet location that they could enjoy and have fun together. Oh boy!! did they have fun! Eating tapas by the Med, a few gins to make them merry, wine, good food, A great time was had for that 24 hours.

Now the girl/older lady in question, loves to make soap and finds inspiration in the most unlikely places. That night away had brought thoughts about how she could incorporate a wood grain soap into a beach themed soap and EUREKA! she had it. A boardwalk soap, inspired by the sun bleached planks that are walked on at the beach. Now just to put that plan into action……

TO BE CONTINUED…..

img_1230

The picture that started it all….

I stand by the Sea and what do I see? I see the sea, staring back at me.

The cool still waters that ebb away slow, but don’t underestimate that mighty flow.

A powerful force that tricks your mind, come on in, I will be kind.

But once you’re in, in its grip so tight! It won’t let you out without a fight.

But today that blue yonder was being kind, a calm, still, pool as far as the eyes could find.

It waves ever so sweetly, and I wave back. See you soon it calls as I turn to track,

My way along the sun bleached wood, the cool blue Med touching where I once stood…….

img_1394

Now to get on with the task in hand. I used my 4lb slab mould that I won from Nurture Soap last month in the piping challenge. Perfect size.

img_1395

My colours are Peacock, Black Oyster and Satin grey pillow from mad oils , also creme de la creme from Umakeitup. For fragrance I used patchouli and cedar essential oils.

My recipe is my go to slow mover which works for me.

10 ozs sweet almond oil

10 ozs coconut oil

10 ozs olive oil

10 ozs palm oil

15.20 ozs water

5.75 ozs lye

img_1400

I used squeeze bottles which I alternately poured lines of soap back and forth. Once I had used up all the soap, I pulled a chopstick through from side to side and because my soap batter was still at thin trace, I gave the mould a few quick spins to try to get a wood knot type effect.

img_1401

img_1403

After the little spin.

I placed it in the oven at 60 degrees c for an hour and left it in to do its magic while cooling down. I actually unfolded after 12 hours and cut it. Here are the cut pics.

img_1441

I wouldn’t say it looks exactly like wood but I had fun with it and like the pattern anyway.

Thanks to Amy again for bringing these great challenges.

As always, Love from Spain.

Carolyn x

Cascading Rose Cake for Greatcakes Soapworks Challenge

Hi everyone!  I come to you from England this month. I am over here for a wedding so I thought I would make a wedding type cake for this piping challenge in honor of my nephew and his blushing bride.

I was pushed to the max for time but I got it made just before I left Spain to travel.

I will warn you once again! There is a serious overload of turquoise and even more overload of roses, piped in turquoise 🙂

I loved this challenge because we could decide what we wanted to make, the sky was the limit, so to speak. I got my thinking cap on and came up with the 2 tier wedding cake idea with cascading roses from top to bottom. This will probably be a very long post but I took so many pics because I wanted to document this one visually as I may never make anything like this again. It was a lot of work and a lot of soap but I enjoyed making it immensely once the creative juices got flowing.

So lets begin!

Firstly I got my piping tips ready, I have loads, not for cakes, for soap cakes lol. My favorites are the Wilton 1M open star which I used for piping on top of the cakes, Wilton 104 for piping the roses and a cake boss leaf tip. I use a flower nail and wilton piping bags for large amounts or some smaller disposable bags for little amounts.

I started off making 2 basic cakes, a larger round 1 and a giant cupcake base to turn upside down and place on top of the other.

I fragranced these 2 with Blue Agava and Cacao FO, which is a beautiful fresh scent.

While these cakes were setting up, I piped all my roses. I made 6lbs of my normal soap recipe which includes oils of Coconut, Palm, Olive, Sunflower, Castor and Shea butter. Out of that I got the 2 cake bases and 35 piped flowers/roses. I used a mix of Peacock & Tahitian teal from mad oils for the blue, Champagne & sister golden hair for the cream and TD for the white flowers.

img_0938

My 3 colors for the roses.

This is the pics of the process of piping a rose, first do 2 cones, 1 on top of the other, then pipe around little arches, 3 arches to start but as the rose gets bigger you need more arches to fill the spaces between. Once I got the hang of things, I made different size flowers in the 3 different colors, blue, white and cream.

 img_0965

After 24 hours, the cakes were ready and so were the roses, so I made another 3 lb batch of soap for piping the cakes, this would be my dual colours in the bag piping to cover the cakes. I colored the soap turquoise and white. I also scored the tops of the cakes, just to make sure the fresh piped soap adhered to the 24 hour old cakes.

img_0986

Just started building up the piped roses with the wilton 1m open star tip. I piped this first and then embedded the top portion on and piped that to hold it in place.

After piping, I placed the previously piped flowers in a cascading pattern down the cakes from top to bottom, I then piped some leaves in between the roses to finish off the look.

img_1033

img_1032

img_1030

img_1020

img_1022

img_1026

Hope you liked the making process. I know it was very long but it really did take a huge amount of time to make. I enjoyed it so much.

Thanks Amy for once again giving us another great challenge.

As always, Love from Spain………. OH NO! Im not in Spain, Im in England! Oh well, Love from this part of the World 🙂

Carolyn X

Creative soap by Steso soap cutter and mould.

WARNING!!!

This blog post contains lots of photos of an amazing soap cutter and mould by Steso. If you don’t like turquoise, please scroll on by 🙂

A few months ago, back in May actually, I seen a video of Tatsiana Serko from Creative Soaps by Steso, cutting a soap with one of her handmade cutters. I fell in love immediately! They are a piece of art and just beautiful!

I thought at the time that 1 would be out of my reach as she lives in California and I live in Spain. Customs is a nightmare to receive anything from the States but I thought “I don’t care, I want one!”

I emailed Tatsiana. A little conversation back and forth and my cutter was ordered. She was really busy and there was 2 months waiting time but I was prepared to wait for my beauty, good things come to those who wait lol.

I was asked what color and design I would like and as I’m a turquoise kind of gal, that had to be my choice. I make a lot of soaps with turquoise in and just love it. Second was design, I love damask prints so went with that and left the rest up to Tatsiana. A couple of days later she emailed me with the print layout, it was lovely, so I went with that. Now the waiting game began. I couldn’t wait to get my cutter and mould, OH YES, I ordered a tall n skinny mould too, made in oak wood and matching print design as the cutter. It was my birthday in June so it was a gift from me to me. Treat yourself was my motto heehee. I put my order out of my mind because I can’t wait for things to arrive! I am so impatient but for this there was no option but to wait.

So here we are today, Friday 12th August. My parcel has arrived, my dreams came true, I’m excited (Yes I’m a Mrs excitable) The long 3 months has finally passed and it is in my home!

And now, what you have been waiting for, THE PICS. There is a fair few but I just love it so much.

IMG_0747.JPG

IMG_0757.jpg

IMG_0745

IMG_0756.jpg

Didn’t I tell you it was gorgeous! And more.

IMG_0763.jpg

There is little notches on the back of the cutter to hang the wire cutter part. This comes in handy when making rimmed soap as you can slice a very thin layer off your soap to make the rim.

IMG_0761.jpg

IMG_0765

A measuring ruler so you don’t have to get the tape measure out every time and can cut each bar perfectly to size. This is handy when making soaps in a slab mould too as normally the slab of soap won’t fit into the cutter, this one is wide enough to accommodate a larger soap, to cut into flat, wide bars.

IMG_0755

And the lovely Logo on the side with cute little matching crystals. Even the screw heads are covered up by black crystals. Such attention to detail!

Now the mould. Comes with a mylar insert so no lining with freezer paper. Holds a 500g batch of soap, so cute. Makes about 5/6 bars so ideal for test batches of fragrance or a new design test and is my favorite shape, tall n skinny. Although, it remains to be seen whether I use it for soap or not. It may just be an ornament in my soap room as something beautiful to admire while passing. I don’t want wet soap ruining this beauty 🙂

IMG_0748

IMG_0751

IMG_0750

IMG_0752

IMG_0749

So there you have it. My beautiful cutter and mould by Steso. Turquoise loveliness overload.

I am off to make a soap to test out this gorgeousness, see you soon.

As always, Love from Spain.

Carolyn x

Great Cakes Soapworks (Dancing Funnel) The Dancing Tortoise

Hi everyone, I,M BACK!

I,ve had 2 months off from Challenge club as I have been so busy with other things, I just did not have time for anything. I have missed being a part of the community, so… this month I made time for ME, and the club.

This month is Dancing Funnel technique taught by Tatsiana Serko. Her soaps are amazing and guess what??? I have one of her cutters and mould on its way to me right now!! I’m so excited!! It will be the only one in the World, designed for me and not repeated, how cool is that? I have waited since May as she was so busy but I didn’t care, it is in the post and I will be receiving it soon. Yayy!

The dancing funnel, when finished, reminds me so much of a tortoise shell. When I was a little girl, I had a tortoise that lived in my garden but one day when I went out to feed her, she had ran away. Well….. Walked away, very slowly, never to be seen again. Sad times in the life of a 7 year old!!! She was probably about 500 years old and fed up of living in my little garden and wanted to explore pastures new, well thats what I believed and no one is changing my mind 🙂

IMG_0736

I picked my colors based on the tortoise shells in the pics. Blue, green, black and yellow.

I used Lemon peel zest fragrance oil as it behaves very well in cp soap and just love the fresh lemon fragrance.

I used black as the the base dot colour, then filled in with the blue, green and yellow alternating the colors in each row.

I split my soap batter into 4, but used slightly less black than all the other colors. I still had black left over at the end.

I started off with the black dots and filled in from there on.

IMG_0716

IMG_0717

IMG_0718

IMG_0719

IMG_0720

IMG_0721.JPG

I was running out of yellow for the top so should have stopped at the blue.

Once done, I put it to bed until the next day. When I took it out the next day it looked horrendous and Jurassic looking. Thank goodness for soap planers! I had to plane quite a lot of the top off the bars which took most of the top ring off making it look different to the technique but I did follow the tutorial.

IMG_0723.JPG

After cutting and planing and cleaning up and beveling, it sort of looked acceptable. I’m not so sure of the colours but it smells nice. I was going to have another try but as always, time is not on my side so this one is it. Here is the cleaned up pics.

IMG_0740.jpg

Close up so you can see the black outline around the colors. I used black as my base and filled in with the blue, yellow and green.

So there you have it, “The Dancing Tortoise”.

I’m so glad to be back and can’t wait to see all the lovely entries.

Thanks Amy and Tatiana for another great tutorial and challenge.

As always, Love from Spain.

Carolyn x